It just (almost) works
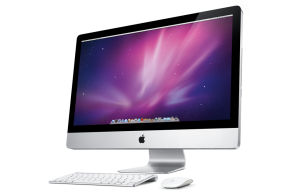
I just picked up a new 27-inch iMac.
I went with the Built-To-Order option of the i7 processor and the Radeon HD 5750 GPU. This is a definite upgrade over my older (although still very capable) 24″ Core 2 Duo.
My upgrade process was about as flawless as possible. I used Super Duper to back up my old iMac’s entire hard drive to an external drive, then cloned that backup directly back onto the new machine. It was literally a brain transplant. All of my applications, settings, preferences, files…everything was just as it was on the old machine, except, you know, faster.
However, it was only 99% flawless, there were a few things that tripped me up, or could have tripped me up if I hadn’t been careful, and I want to share them here for any readers who might be interested in doing the Super Duper mac brain transplant route.
1. Don’t forget to de-authorize your old machine with the iTunes store prior to shutting it down. Since you need to authorize the new computer to play your iTunes content, you’ll need to remember to do this, otherwise the old machine will continue to use up one of your 5 authorizations even if it it never gets used again (or the disk is erased). This is because iTunes authorizations are based on the physical CPU, not the OS.
2. While almost all application settings get carried over automatically as part of the clone, a few apps store their settings in non-conventional ways and will detect that you are on a new CPU. Little Snitch, a network monitoring app, lost its registration in the move and I had to re-enter my serial number on the new CPU.
3. If you use any VM software, when you load your virtual machines, they will likely detect the new hardware and go through a Windows driver dance. My Windows 7 and XP VMs handled this without a problem, but Windows’ over-sensitive activation system may bitch at you and make you go through the whole “Genuine Windows” registration crap if it detects that too much of your system specs have changed.
4. If you are going to use Boot Camp, be sure to create your boot camp partition first, right after booting the new machine, and before you restore from your clone. Otherwise, you may have trouble creating the boot camp partition at a later time. When I forgot this step, Boot Camp complained that it couldn’t create a partition because certain files could not be moved (in spite of the fact I was trying to create a 100 GB partition from a disk with 500 GB free space). I ended up having to reformat the drive, install a rump OS just long enough to run Boot Camp Assistant, and then re-write my cloned drive – a waste of 6 hours.
5. Some routers get very confused when a second machine with a different MAC address but the same IP and name gets connected to the network. This may cause things like port forwarding to fail. My 2-Wire U-Verse router got completely confused and I had to delete its list of “known devices” and recreate the port mapping from scratch. There’s no way around this, just make sure to test your inbound connectivity after you set up your new Mac.
So, that’s it. Other then that, so far, everything has worked. Moving into a new Mac this way is far superior an experience to the normal method of either running the Migration Assistant, or manually upgrading. However, keep in mind that this method is a true brain transplant – it brings along all the cruft and crap that is part of the old system too. If your old Mac is not shipshape, its sins will be visited upon the new one!

This might not work if a new Mac requires a newer version of Mac OS than was on your old Mac. So look before you leap.
Also, the new Mac might come with newer apps, eg iLife. You can probably install those from the New Mac’s DVDs.